On a PC, the keyboard has a separate Print Screen button, clicking on which the screen image is copied to the clipboard. There is no such key on the Mac keyboard, but there are several shortcuts that allow you to make not only a screenshot of the entire screen, but also individual areas of it. In addition, you can send a snapshot to the clipboard, or simply save it to your desktop.
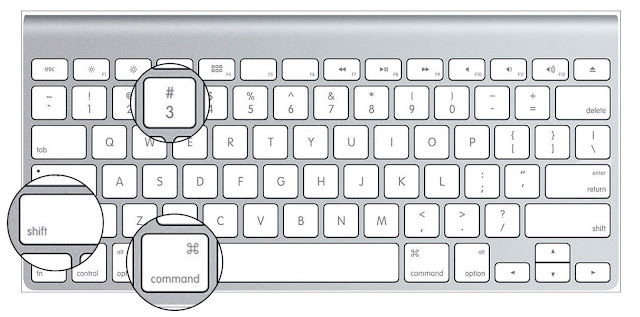
Most popular print screen mac method:
- Command + Shift + 3 – screenshot of the screen, the file is placed on the desktop
How to print screen on Mac 2019:
- Command + Shift + 3 – screenshot of the screen, the file is placed on the desktop
- Command + Shift + 4 – screenshot of the selected area, the file is placed on the desktop
- Command + Shift + 4 + Spacebar – Save a snapshot of the current window to the desktop
- Command + Control + Shift + 3 – screenshot of the screen, placed on the clipboard (similar to the Print Screen button in Windows)
- Command + Control + Shift + 4 – screenshot of the selected window, placed on the clipboard
- Command + Control + Shift + 4 … Spacebar – save a snapshot of the current window to the clipboard
Space bar to capture a snapshot of the window to press after releasing the rest of the keys. The mouse cursor changes from a cross to a camera, and you can select the desired window. The window shot is captured along with its shadow. Moreover, the shadow is translucent, so that the picture can then be placed on any background without additional processing.


0 Comments
Share your thoughts with other AppleBlog readers.